Re/max Innovative Properties

If you want to add a pond or water feature to your yard, it might surprise you at how simple the process is. With some basic tools and only a few materials, you can make a tranquil custom water feature to add dimension and style to your outdoor space. Here we’ll go through the steps to make your own DIY garden pond.
Shovel
Rubber pond liner
Spray paint for marking
Sand
Rocks/stones for the base and edges
Plants
Small fountain (optional)
First, you will need to prepare the area for your pond. This means removing any rocks, plants or debris and enough room to build.
Measure out the space for your pond and mark the boundaries with spray paint. This will be your digging guide.
Dig out the shape for your pond at least 2 feet deep. The shape doesn’t have to be perfect—the more irregular the more natural it will appear.
After digging the hole, pour in a layer of sand. Cover the soil completely to a depth of about 2 inches. Around the sides, build up a thicker layer of sand and taper it down towards the middle of the pond.
Lay down the pond liner so that it molds to the shape of the pond hole. Tamp it down into the edges but be careful to completely cover the entire area with some extra overlap. Secure the edges with rocks or stones.
Add the fountain pump at the deepest part of the pond. Use additional rocks around the base to make sure it stays upright.
Cover the bottom of the pond with your pond stones. You can use a mixture of sizes but save the larger ones for the edges. Try to mimic the look of boulders and be creative with your placement.
Next, add your choice of plants around the edges. You can try to create a natural look with local plants or make something completely of your own design. Try mixing plants of different sizes and textures for visual appeal.
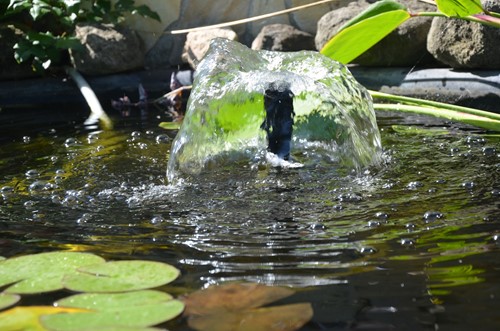
Fill the pond with water and test the fountain to make sure the water flows. You can also adjust placement if it’s too low or sitting too high in the water. Once you have the perfect flowing water sound, you’re all set.
Hardscaping and adding water features can be complex processes. Luckily, this project you can accomplish in a weekend at any skill level. As long as you follow the fountain instructions carefully you’ll have an excellent water feature to add depth and tranquility to your yard.
With over 18 years of experience, Jessica is licensed New Hampshire and Massachusetts. A proud member of the National Association of Realtors, Jessica values the highest code of ethics and standards expected of her. As a seller’s agent, she uses the most current market information to properly value the property. In addition, with her experience she is able to assist sellers on the best ways to improve homes so they can solicit the highest offers. Jessica works with a cutting edge marketing & social networking firm to obtain the maximum exposure for all of her listings. Known for her negotiating skills, she has a passion for working with buyers providing knowledge of what to expect & peace of mind throughout the process. In addition to what Jessica provides as a buyers agent, she works closely with a team of experts so it’s a “one stop shop” for all her buyers. In addition to her real estate career, Jessica is also a licensed loan originator in N.H. Combined with her expertise in both real estate, mortgages and finance, Jessica has a full understanding on the home buying and selling process. In today's real estate market it is so important for sellers and buyers to work with an agent who has great skill set and experience.
